Posts

Showing posts with the label colinux

Linux (Ubuntu) in Windows #7 Qemu to coLinux
Image
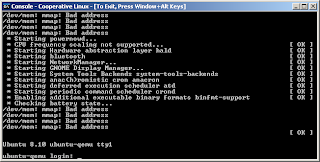
Convert Qemu Image to coLinux Image อยากที่บอกว่า Emu มันช้า อย่ากระนั้นเลย แปลงมันมาใช้กับ coLinux ดีกว่า 1.เริ่มด้วย cd เข้าไปหา directory ที่มี Image ของ Qemu จะใช้ Cygwin หรือติดตั้ง unxutils ก็สะดวกดี unxutils : Some ports of common GNU utilities to native Win32. In this context, native means the executables do only depend on the Microsoft C-runtime (msvcrt.dll) and not an emulation layer like that provided by Cygwin tools. แล้วก็แปลงไฟล์ด้วยคำสั่ง dd if=qemu_ubuntu_4gb of=ubuntu_4gb.img bs=512 skip=63 ตามคำแนะนำของ coLinux 2.Copy ไฟล์ไปใช้กับ coLinux คราวนี้ใช้ D:\coLinux (เพราะ drive C ใกล้จะเต็มแล้ว 555) แล้วก็สร้าง swap file สำหรับ coLinux ด้วยคำสั่ง fsutil file createnew swap_512mb 536870912 แล้วก็ย้ายไปไว้ใน folder root_fs ทั้ง ubuntu_4gb.img และ swap_512mb 3.จากนั้นก็สร้างไฟล์ config สำหรับ coLinux (ubuntu8_10.conf)ดังนี้ kernel=vmlinux initrd=initrd.gz (ใช้เฉพาะตอน boot ครั้งแรก) mem=256 root=/dev/hda1 fastboot 5 hda1=\DosDevices\D:\coLinux\root_fs\ubuntu_3gb.img hdb1=\...

Linux (Ubuntu) in Windows #5 X Application

Image
ที่นี้มาลองใช้งาน X Application กันบ้าง แต่ตัว coLinux เอง ไม่สามารถ ต้องใช้อุปกรณ์เสริม ซึ่งก็มีให้เลือกหลายตัว เช่น Cygwin/X , Xming , X-Win32 ที่ผมเลือกใช้คราวนี้ คือ Xming ซึ่ง download ได้จาก SourceForge พอ Download เสร็จ ก็ติดตั้ง เสร็จแล้วก็จะได้ X icon อยู่ที่ System tray ที่นี้ก็มาลองใช้งานกันเลย เริ่มจาก สั่งให้ coLinux ส่งค่า display ไปให้ Xming ซึ่ง run รอไว้อยู่แล้ว ด้วยคำสั่ง export DISPLAY="192.168.1.1:0" 192.168.1.1 คือ IP ของ Windows เสร็จแล้วก็มาลองเรียก X Application กัน เริ่มด้วย gedit update-manager ก็ได้ด้วย หลังจากนี้ก็ลองเล่นกันดูนะครับ สำหรับ Ubuntu ใน Windows ส่วนผมไหน ๆ ก็เรียก update-manager มาแล้ว ก็ขอ upgrade เป็น hardy ซะเลย

Linux (Ubuntu) in Windows #4 Ubuntu Desktop

Image
จาก Linux (Ubuntu) in Windows #2 coLinux พื้นที่ 2GB คงไม่พอยาไส้ ถ้าจะใช้ X Application ถ้าอย่างนั้นก็ต้องขยายขนาดกันหน่อย ด้วยคำสั่ง dd หลังจากที่ ติดตั้ง Cygwin แล้ว ก็ใช้ประโยชน์กันเลย 1.cd เข้าไปให้เจอ root fs ของ colinux แต่ผมขี้เกียจเลย copy root fs ของ colinux ไปไว้ใน home ของ cygwin ซะเลย 2.สร้างไฟล์ขึ้นมาใหม่ เพื่อจะใช้เป็น root fs ซึ่งมีขนาดใหญ่กว่าเดิม และตั้งชื่อให้สื่อขนาดซะหน่อย ด้วยคำสั่ง cp Ubuntu-7.10.ext3.2gb.fs ubuntu.ext3.4gb.fs ไม่ต้องระบุ version กันละ เผื่อ upgrade 3.จากนั้นก็ขยายไฟล์ด้วยคำสั่ง dd ดังนี้ dd bs=16384 if=/dev/zero of=ubuntu.ext3.4gb.fs seek=131072 count=131072 dd คือ คำสั่ง bs คือ Block Size ,16384 ก็เท่ากับ 16KB if คือ Input File ในที่นี้เราจะขยาย ก็เลยไม่ต้องระบุไฟล์ต้นฉบับ (อันนี้ไม่แน่ใจว่า เข้าใจถูกมั้ย) of คือ Output File ที่เราต้องการ นั่นก็คือ ubuntu.ext3.4gb.fs seek คือ จำนวน block ที่เราต้องการ skip, ตามสภาพของเรา ไฟล์เดิมมีขนาด 2GB ดังนั้น ก็คือ 2GB / 16KB ก็ได้เท่ากับ 131072 (จะหารเองก็ได้ แต่ใช้ google ช่วยก็สะดวกดีครับ โดยพิมพ์คำว่...

Linux (Ubuntu) in Windows #2 coLinux

Image
วิธีติดตั้ง Linux ใน Windows ด้วย coLinux 1.อันดับแรกก็ Download สิ่งที่จำเป็นสำหรับใช้งาน coLinux Cooperative Linux is the first method for optimally running Linux on Windows and other operating systems natively. It is a port of the Linux kernel and support code that allows it to run cooperatively without emulation along with another operating system โดย download ได้จาก sourceforge ซึ่งต้องใช้ 2 ตัว คือ - ตัวโปรแกรม coLinux คือ coLinux-stable ของผมเลือกรุ่น 0.7.3-linux-2.6.22.18 (coLinux-0.7.3.exe) - Image ของ Linux ผมลอง 2 ตัว คือ * Images 2.6.x Debian รุ่น Debian 4.0 Etch (Debian-4.0r0-etch.ext3. 1gb .bz2) * Images 2.6.x Ubuntu เป็น Ubuntu 7.10 (Ubuntu-7.10.ext3. 2GB .7z) พอ Download เสร็จก็แตกไฟล์ด้วย 7-Zip จะได้ไฟล์ขนาด 1GB สำหรับ Debian และ 2GB สำหรับ Ubuntu 2.ต่อไปก็ติดตั้ง coLinux ซึ่งวิธีการก็ไม่ยาก คลิก Next ไปเรื่อย ๆ หน้าที่เลือก Component ก็เลือกไปทั้งหมดเลย ส่วนตำแหน่งที่จะติดตั้ง เค้าแนะนำให้ติดตั้งที่ C:\coLinux ระหว่างติดตั้งก็จะบอกให้ติดตั้ง WinPcap ...